
 Français
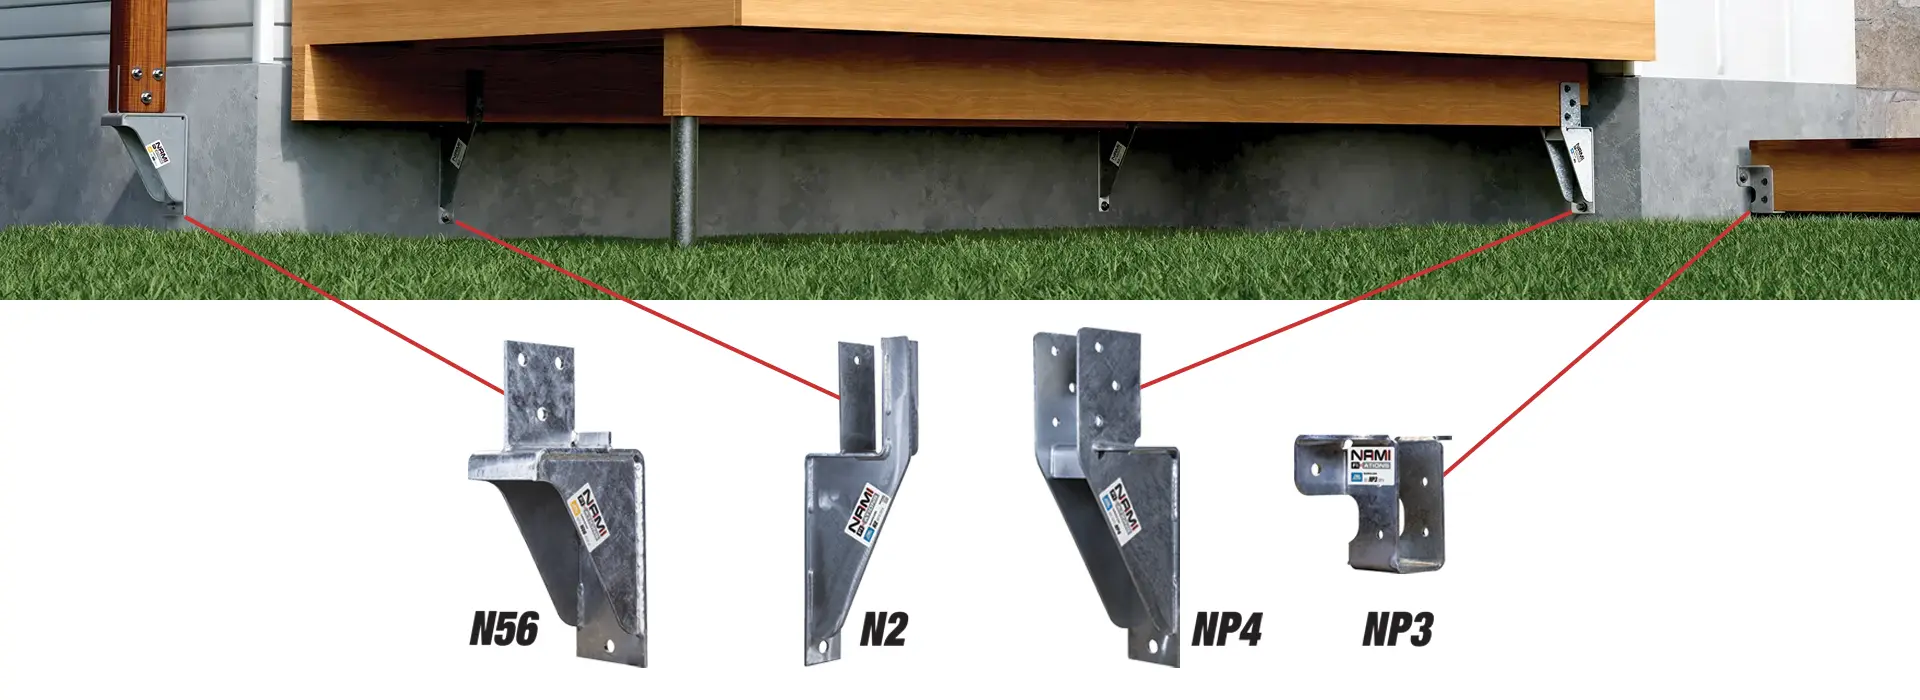
SAVE VALUABLE TIME WITH OUR NAMIFIX ANCHORING SYSTEM!
Preserve the integrity of your exterior cladding by attaching the supports to your foundation, and instantly discover the strength of our system. Simply follow the “Mark – Drill – Attach” steps, which are accessible to everyone. In just moments, you’ll be ready to start your project on a solid and compliant foundation!


Calculate the number
of NamiFix hangers needed

STEP 1
Determine the support model that is suitable for your project.
STEP 2
Determine the performance of the structure to establish the number of anchors based on their capacity.
Reference load: 100 lb/ft2
CALCULATION FORMULA:
(Length x Width) x 100
House side x Terrace depth
Divided by 2
The structure is supported by 2 sides
Divided by the capacity of the involved support
Example for the N1200 model 

(12 ft x 12 ft) x 100
14 400
14 400 ÷ 2
7 200
7 200 ÷ 1 200
6 N1200 anchors
It is possible to reduce the number of anchors by decreasing the distance between the foundation and the support point. Apply the same calculation.
IMPORTANT
This calculation is for informational purposes only. It does not replace consultation and validation by a professional. Each project is unique in its design, geographical location, and the regulations that govern it. Nami Fixations inc. is committed to providing a part with performance validated by engineering. The number of supports and their use are the responsibility of the users. ATTENTION: It is recommended to increase the number of supports when the calculation result for the number of supports includes decimals.
The distance between 2 hangers can be up to 7 ft.
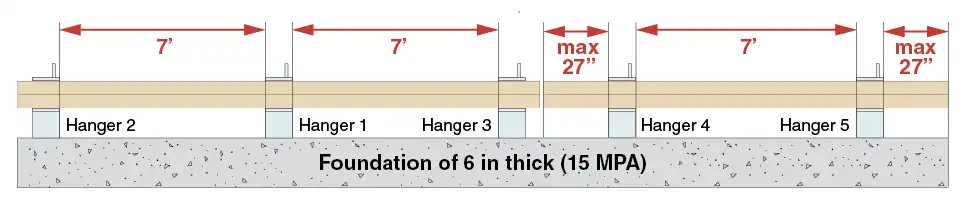
ASSEMBLY OF THE BEAM

There should be no wood piece junction
on a NamiFix hanger.
Note that, for proper installation, the load-bearing capacity has been calculated considering solid, seamless beams.
Each beam is independent, thus influencing the placement of the supports. Simply arrange them end to end to achieve the desired length.

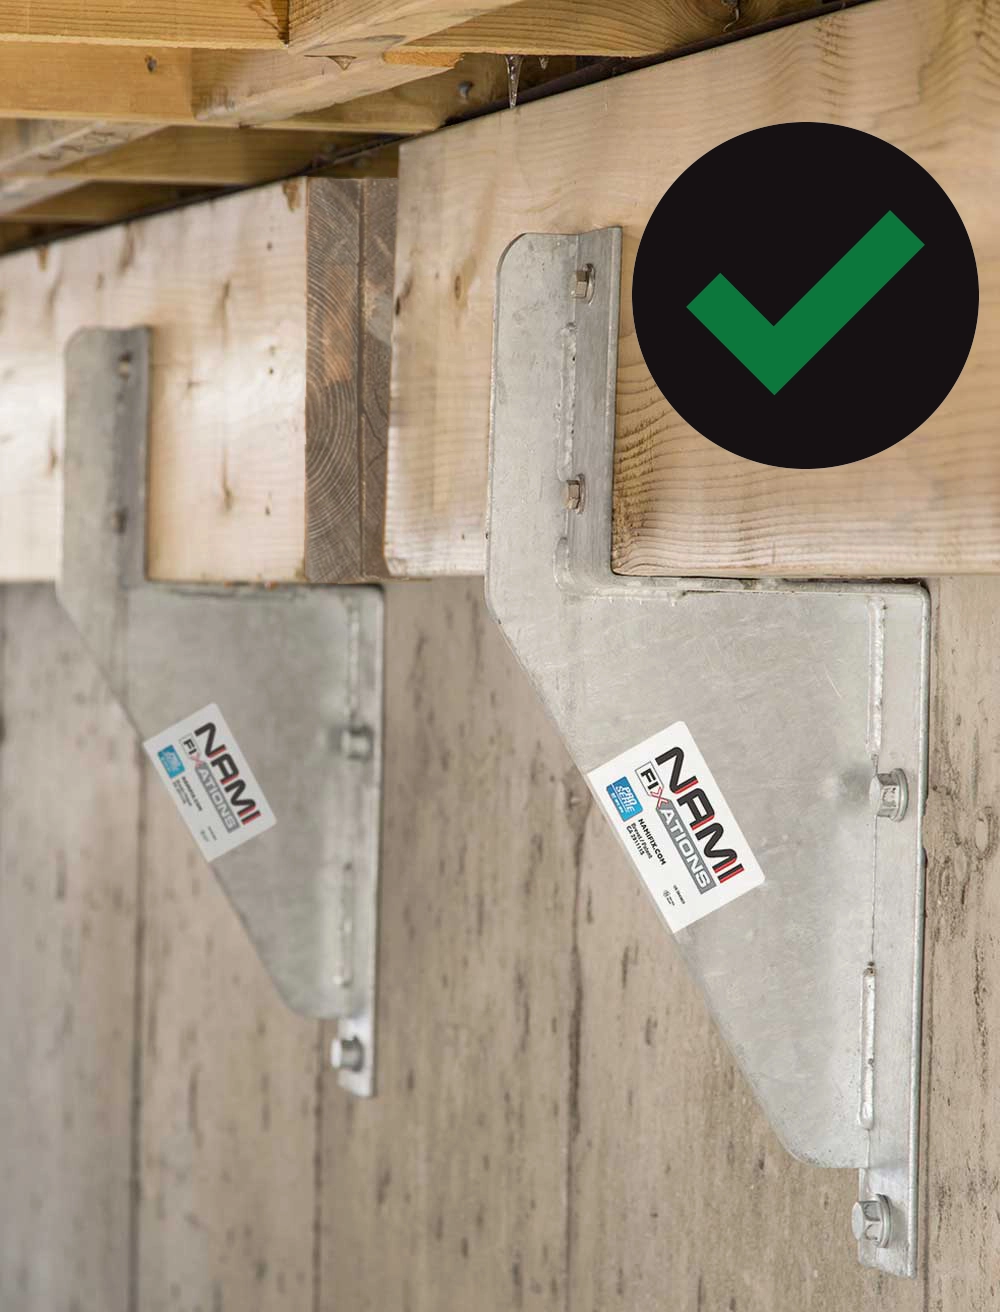
There should be no wood piece junction
on a NamiFix hanger.
Note that, for proper installation, the load-bearing capacity has been calculated considering solid, seamless beams.
Each beam is independent, thus influencing the placement of the supports. Simply arrange them end to end to achieve the desired length.
Installation Steps
NamiFix N2 Hanger
Applies to all our supports as well.
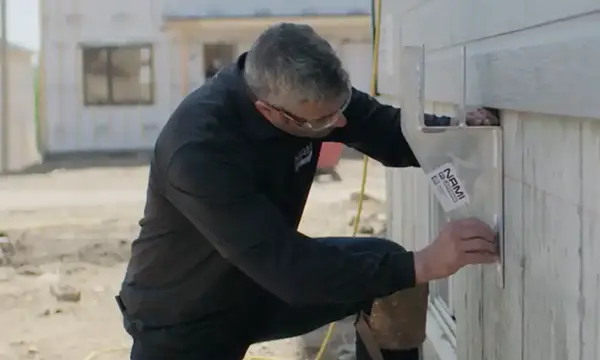

IMPORTANT

The hangers must be securely fixed to a concrete foundation with a minimum thickness of 6 inches (15 MPA).

Before drilling, ensure there is at least 8 inches of concrete all around the future holes.

Do not install on a block foundation.
Determining the position of your hanger
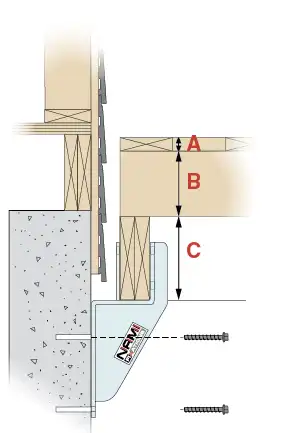
- Determining the “final height” of the deck.
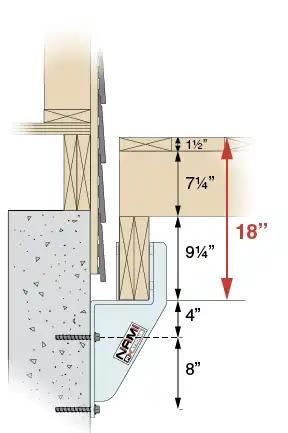
- By subtracting this measurement (final height), you will obtain the position of your support. Example: A-Floor 1-1/2″ + B-Joists 7-1/4″ + C-Beam 9-1/4″ = 18″ (see illustration).
- Final height – 18″ = Height of hangers.
- Level each support and align their final position along the length.
IMPORTANT: Before drilling, it is crucial to ensure that there is a minimum of 8 inches of concrete all around the future drilling holes.
If you have less than 8 inches above the drilling hole, you have 2 options:
- Lower the final height of the deck.
- Modify your structure upward, here are some examples:
Structure Models
HEIGHT: 18 in
JOISt: 7.25″
BEAM: 9.25″
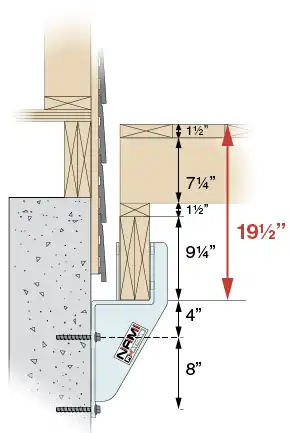
HEIGHT: 19.5 in
JOIST: 7.25″
+ beam: 1.5″
beam: 9.25″
HEIGHT: 20 po
JOISt: 9.25″
BEAM: 9.25″

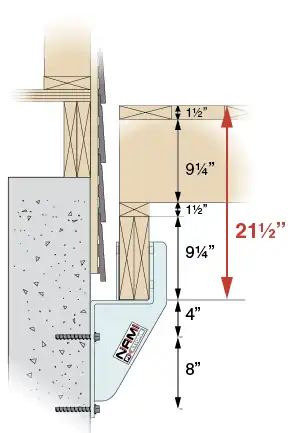
HEIGHT: 21.5 po
JOISt: 9.25″
+ beam: 1.5″
BEAM: 9.25″
HEIGHT: 22 po
JOISt: 9,25″
BEAM: 11,25″
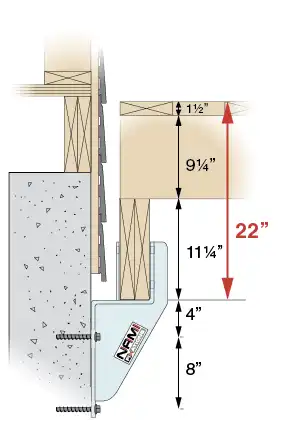
HEIGHT: 23.5 in
JOIST: 9.25″
+ beam: 1.5″
beam: 11.25″

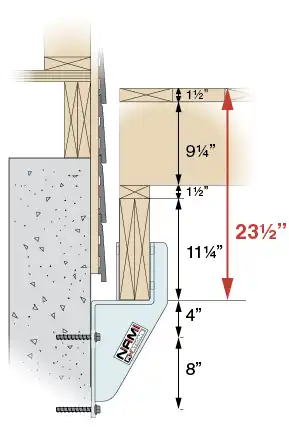
DRILL THE FOUNDATION
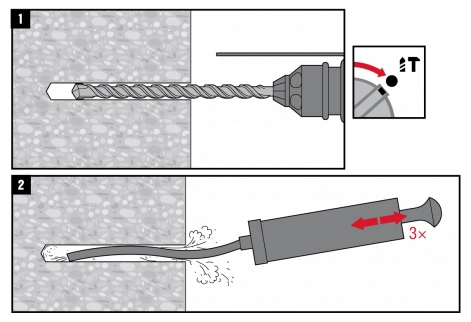
The diameter of the drill bit needed is exactly the same as that of the anchor provided with the support, as identified on the box. Simply choose a drill bit length sufficient to allow the anchor to penetrate completely, plus 1/2 inch.
Hangers N1200, NP2500, N2 and NP3:
1/2 inch drill bit
Hanger NP4:
5/8 inch drill bit
Hangers NP5 and N56:
3/4 inch drill bit
Simply follow the steps below to drill
Don’t forget to ensure you have maintained the 8-inch clearance from any opening.
*IMPORTANT: Drilling must never penetrate through the foundation..
If using spacer plates, adjust the depth if necessary.
DRILL
- Drill. It is recommended to use a level to ensure drilling straight.
- Clean the holes to maximize the performance of the anchors.
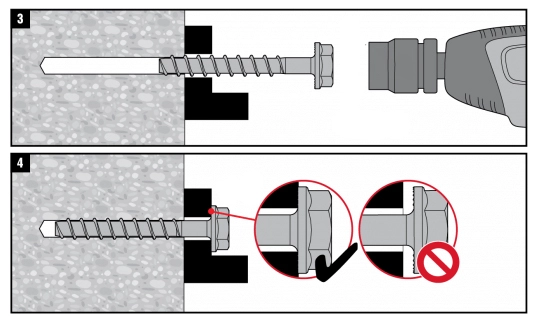
SECURE THE HANGER
For our warranty to be upheld, you must use the anchoring screws provided with the hanger. Tighten to achieve a firm support against the foundation. Be sure to adhere to the tightening torque (refer to the pictogram on the back of the hanger box).
Once you have secured all the required hangers, you can place your wooden pieces into the brackets and fasten them with the recommended hardware.

SECURE THE MAIN BEAM TO THE BRACKETS OF THE NAMIFIX HANGERS
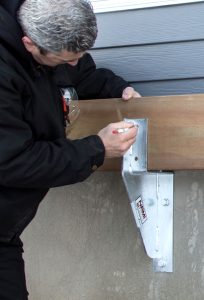
When the beam is inserted into the bracket, mark the top hole for each hanger. This will be used to install the screw with nut.

Overlap your two pieces of wood and drill a hole of approximately 5/8″. Go through both pieces. Drill the top hole only.

Place your beam (2 pieces) back into position in the bracket, aligning the holes. Insert and screw in the screw with nut.
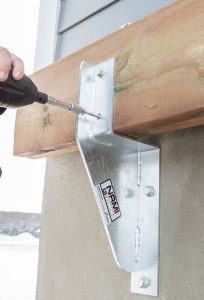
Final step for fixing the beam. You must screw the wood screw into the bottom hole.
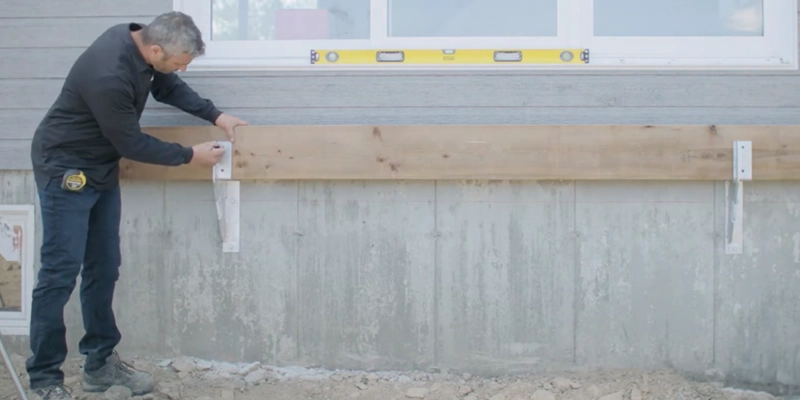
For the N1200 and N2 hangers, only the top hole is present on both the front and back metal parts of the bracket. This way, by drilling both pieces that make up the beam, you can insert the bolt and a washer on one side, and place the nut and another washer on the other side. Use a wrench to tighten until there is complete hanger of the front and back metal parts. A wood screw with a washer in the bottom hole completes the installation of the beam.
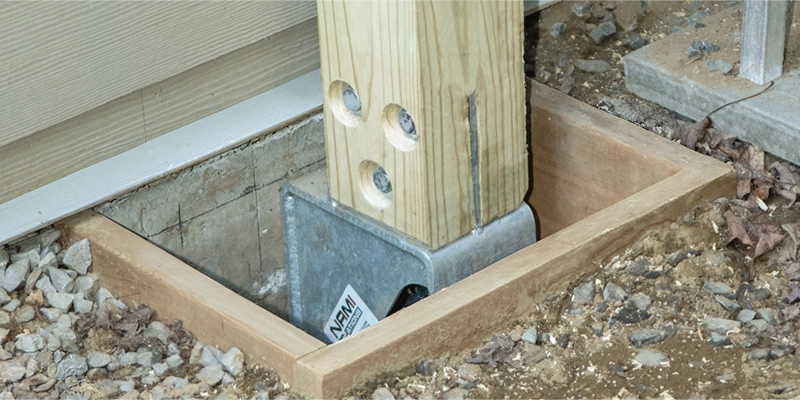
For other NamiFix hangers, the same steps must be followed using bolts, washers, and nuts in each of the holes, depending on the hanger model used.
For these support models, the effect of wood shrinkage requires a more precise and complete fixation.
The bolts, lag screws, washers, and nuts required are not included with the hanger.
Accessories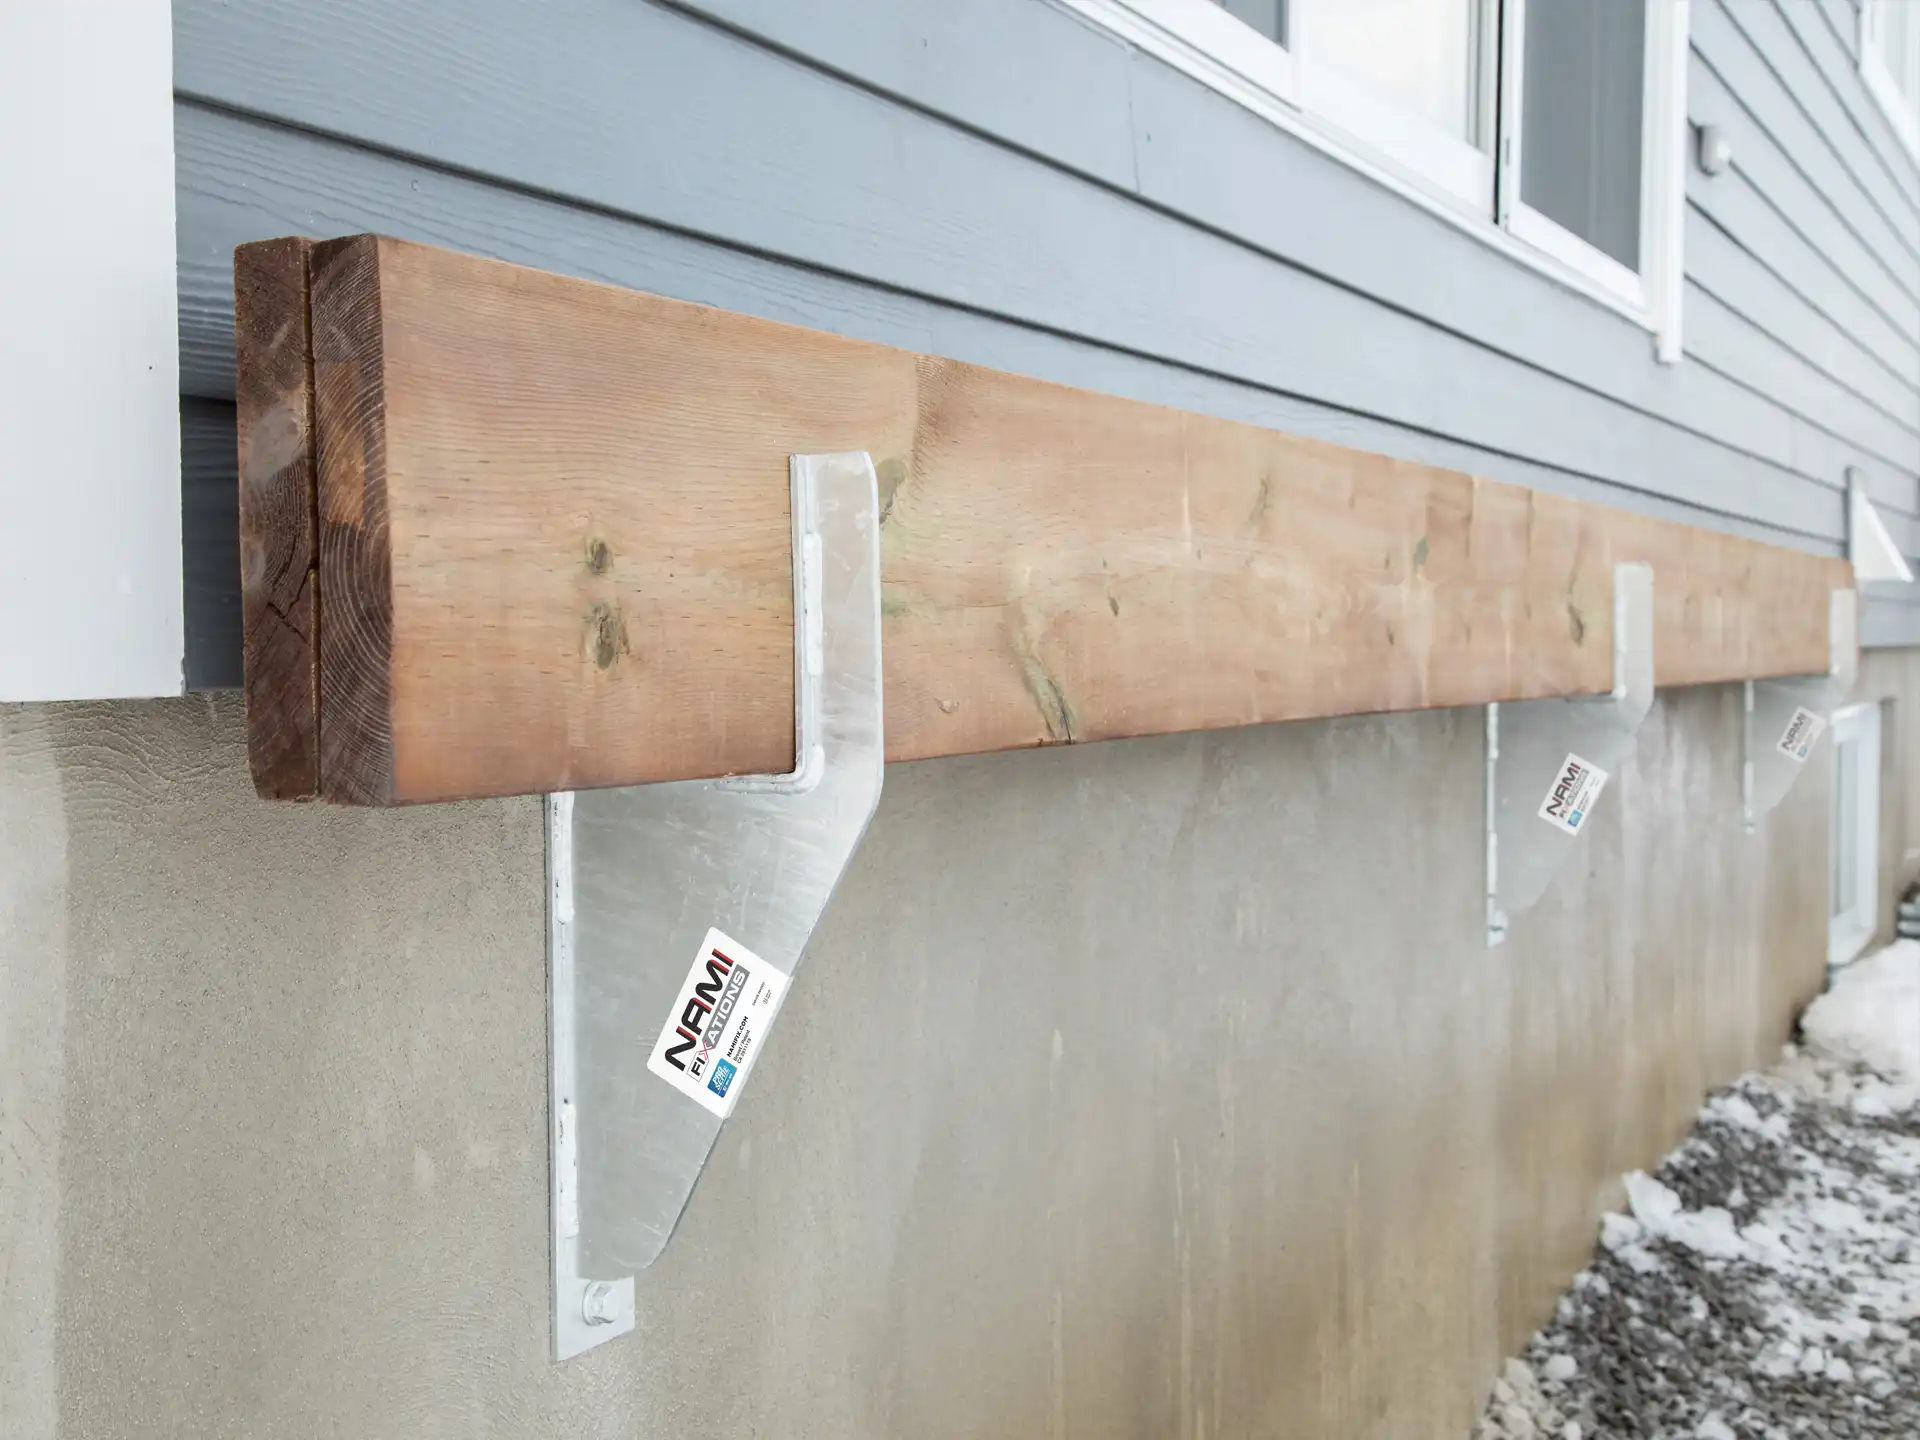
Your starting beam is now ready to receive your structure!
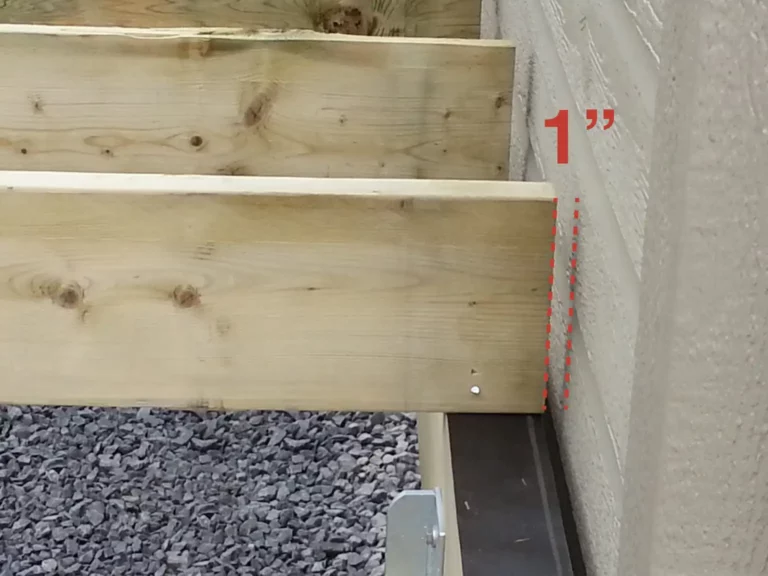
Plan to keep the joists about 1 inch away from your cladding to avoid any risk of accumulation between the joist and the structure.
